Showing posts with label bags. Show all posts

Sunday, December 18, 2011

Ipad carrying cases

So our school district was lucky enough to have a donor donate enough money to buy every middle school and high school student their own Ipad to use for "educational" reasons. Initially a lot of parents didn't want them because that is one more thing to monitor for your kids, to lose, to break, to accessorize, to argue about. (if you have pre-teens and teenagers you know what I'm talking about!) Anyway, I have 3 kids in that age group so we have 3 Ipad that are leased to us from the school and we have to monitor, try to not break or lose, accessorize and argue about. They are not supposed to download their own apps (school rule) so we don't have to worry about that. It's mostly the touch screen fascination that we have to monitor and the mindless time wasting that goes on. But, my kids are good and we haven't had too many problems.

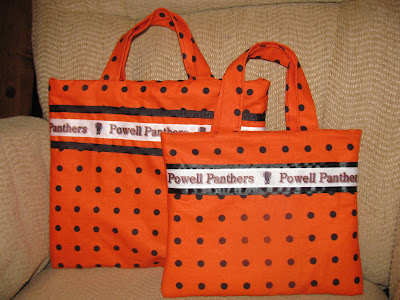
Which brings me to the point of this post- to post pictures of all the ipad carrying cases I have been making! Teachers need them, students need them so why not whip up 10 or 20 to sell and to give as gifts? They are easy to make and fun to play with different trims and ribbons to make them all cute. I've mostly made girl ones because the little handles make them look kinda like a purse. I did make one boy one out of camo material without the handles for my son and he says he likes it. I didn't put any cardboard or hard siding inside which is why I call them carrying cases rather than cases, because they should still be in a hard case first and then slipped inside this padded carrying case. They have made great gifts for my kids teachers and friends for Christmas! They have a coordinating lining fabric inside and close with a long piece of velcro that is sewed into the lining. I think I forgot to take pictures of 5 or 6 others I made.

So contact me if you want some made and I'll find some cute fabric for you!


I can't figure out why these ones are sideways, I've tried everything so you're just going to have to turn your head to see them right...

Thursday, May 26, 2011

Library bag with card pocket

So today we went to the library to sign up for the summer reading program. My 4 year realized that he was the only kid who didn't have his own card. So we signed him up and he got his very own orange library card. He kept it in his pants pocket all the way home so he wouldn't lose it. At one point in the car he cried in panic, "I lost my card!" It's not a quiet cry either. But, we found it on his seat and he was good again. I thought that he could use a little pocket to keep his precious card in and hopefully not lose it. So I took my denim scraps from pants that I collect and fashioned a library bag with it's own card pocket on it just for him.


Quick tutorial:
1. Cut two equal pieces for front and back of bag- including a pocket from pants on one side. I had to piece a few different pieces to get it the size I wanted.
2. Cut two end pieces, the same height as the front and back and about 3 inches wide.
3. Cut a bottom piece, the same width as your side pieces and the same length as your front and back pieces.
(this is when you would personalize the front of the bag with a name if you are going to do so. I ironed my letters on with stitch witchery, then sewed them for durability.)
4. Sew pieces together in order: front to side, side to back, back to side, and side to front. It'll form a loop.
5. Turn inside out and sew the bottom piece on to all the pieces already forming a loop, pivoting the needle at the corners.
6. Turn inside out. Cut two strips about 3 inches wide and the same length as each other (about 12 inches).
7. Fold and press them in 1/2 inch on each long side and then fold them on top of each other to form the handles. Sew the long end together.
8. Position your handles on your bag the same width apart as each other on either side of the bag. Sew into place using a square or an X pattern.

Hopefully we can keep track of our books and our card the entire summer!

Leave a question if you want to try and make one but need help with the directions!

I posted on a few linky parties, listed on my side bar.


Thursday, May 12, 2011

Game Organizing Bags

I have an awful game closet. Here is proof:


Maybe it's because it also houses office supplies, craft supplies, camera bags, zillions of cords, a file box, photos, videos and other random things. I often find dice or marbles or random game pieces in my office supplies or craft supplies. I needed to start somewhere so I made these game piece bags with the name of the game on the front in big letters. None of the boxes that our card games came in have lived through six kids so card games are in plastic bags. They do the job (until the zip lock seal stops lining up) and they aren't cute! Several boxes that bigger games came in are also squished, ripped, or missing one side so the pieces fall out and get lost or mixed up. I'm hoping these little bags will start to help solve my attitude about this closet. I have a few modifications to make so that I will LOVE them but for now, they will house some games.


Now I'm determined to make the rest of the closet look better too!

Sunday, August 22, 2010

Bags, Bags and more bags

I love bags. I wish I had more reasons to make bags. I do need a new diaper bag. Maybe that'll be my next project. These are some bags I've done over the years.

This is a pieced tote bag I made for myself last summer. I ended up loving the colors, all from fat quarters. I use it to go to church. Most weeks I wish it was a little bigger.


This is my favorite bag that I've made. It's a scrapbook bag for Haley. It's HUGE and holds all her supplies and a big scrapbook inside. I like that she has somewhere to keep everything. I did buy a pattern for this bag and it took quite awhile to make. I had a friend use her embroidery machine to make her name which I then sewed on.


There are pockets all around the bag for supplies.

This is an insert that goes into the scrapbook bag to hold more supplies.

This is an easy "hobo sack" that we keep some play food in. I got the pattern from a friends blog and have made several already.


This is a scripture bag that Haley and I made. I didn't have a pattern but just used my know-how from other projects to make a coordinating lining and handles.